DIY Deck Makeover

Warning: This post may not be suitable for those faint of heart!
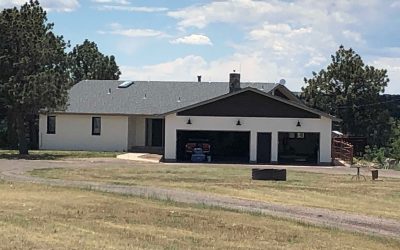
This past May I began my deck makeover – and it has been a major undertaking!
In Colorado, we don’t normally get a lot of rain but of course, since I wanted to tackle this project it rained almost every day in the beginning, and then it got so hot I couldn’t stand to be outside for too long. I began to get frustrated and almost thought about moving on to something else but decided I’d stick it out and get it done. Here we are and it’s September but it’s finally done!


…this is not a project you want to tackle unless you really just can’t look at that ugly deck anymore.
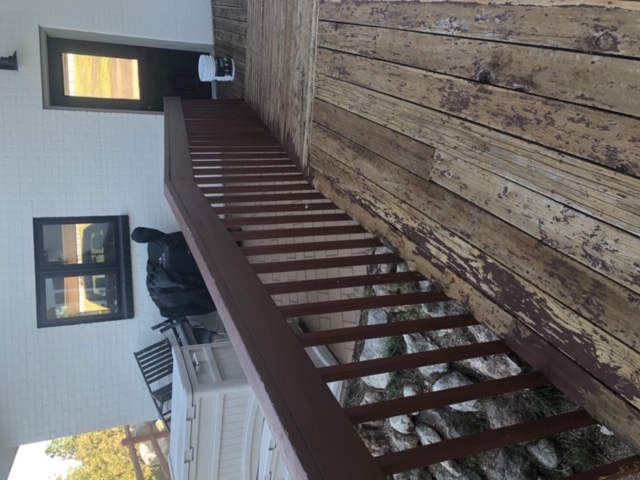
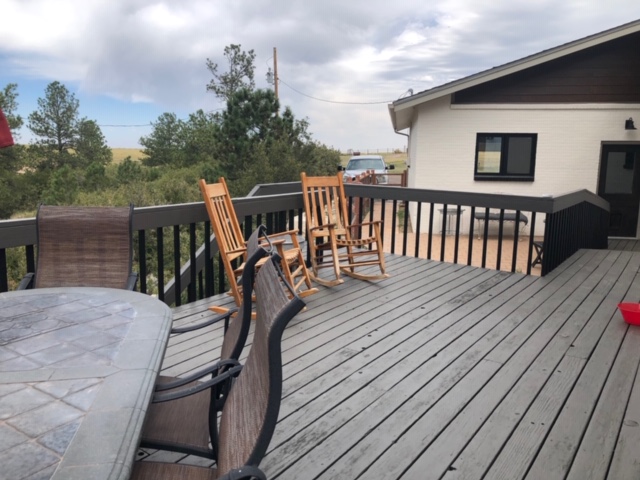
Let’s begin. It wouldn’t be a DIY project without before and after pics so take a look. Of course, I had to include a couple with the doggies since they were a huge help in completing this project.
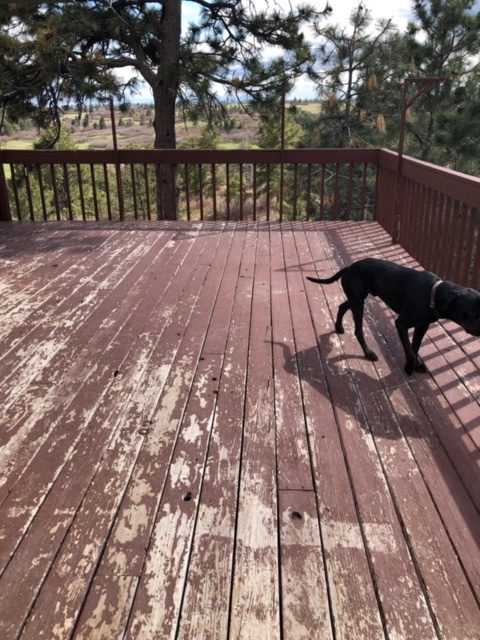
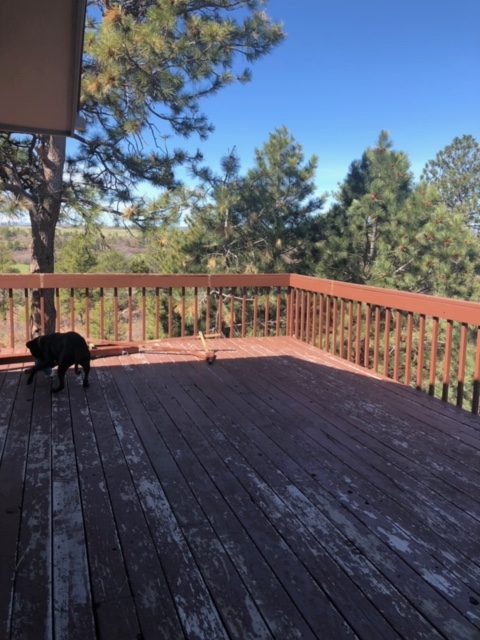
If you read my warning this is not a project you want to tackle unless you really just can’t look at that ugly deck anymore; and I just couldn’t look at that ugly red anymore! I assume that the color was probably called redwood but in the ’80s when this was popular I was in elementary school and didn’t care anything about DIY. 
It took me some time to decide on colors. I wanted a darker grey but was concerned with it absorbing too much heat and making it uncomfortable for the dogs to walk on. My doggies access the back yard (their potty place) from my deck so I couldn’t let their feet get too hot.
So how did I decide? Once again my husband, who has ALL the tools, stepped in and helped.
He has a temp gun so we took the sample chips that I had chosen and laid them on the deck and let them absorb the heat. Once we let them soak up the heat we took the temperature with the temp gun. I also measured the temperature of the old redwood paint to see what that would read at.
We’ve lived in our home for almost 2 years now and the dogs had always walked around comfortably on the redwood so I knew we needed a paint that would be close to the same temperature.
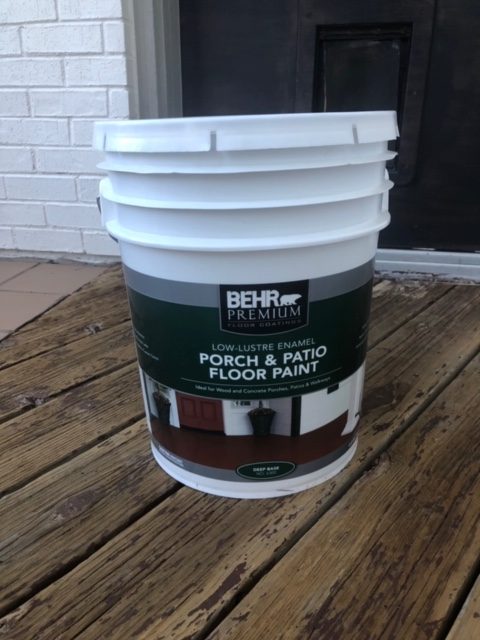
Once I got that handled I headed to Home Depot and bought Behr Porch & Patio Paint in Peppery (Gray) and Limousine Leather for the spindles.
To start you’ll need the following items to tackle this project:
- Power Washer
-
Paint Roller (Rough Surface or Semi Rough Depending on the weathering of your deck)
-
Pole Extender (You don’t want to be on your hands and knees rolling the deck)
- 3” & 1’1/2” Angled Paint Brush
-
Painters Tape
- Patience!

-
Behr Porch & Patio Paint (10 Gallons of Peppery & 6 Gallons of Limousine Leather)
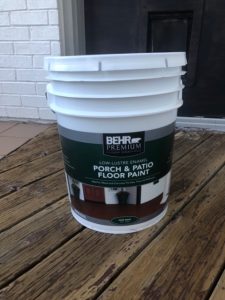


Once I got the temperature for the deck figured out, I headed to Home Depot and bought Behr Porch & Patio Floor Paint in Peppery (Gray) and Limousine Leather for the spindles.
LET'S GET STARTED!

Power Washing
Remove all items from your deck.
Power Wash your deck. If you don’t have a power washer you can rent one at your local Home Depot. If you need to rent one make sure you have your area that needs to be power washed ready to go. You don’t want to waste precious time on your rental and not be prepared to start power washing when you get home. Lucky for me my husband has every tool imaginable (have I mentioned that?) so all I had to do was make a quick trip to the barn.
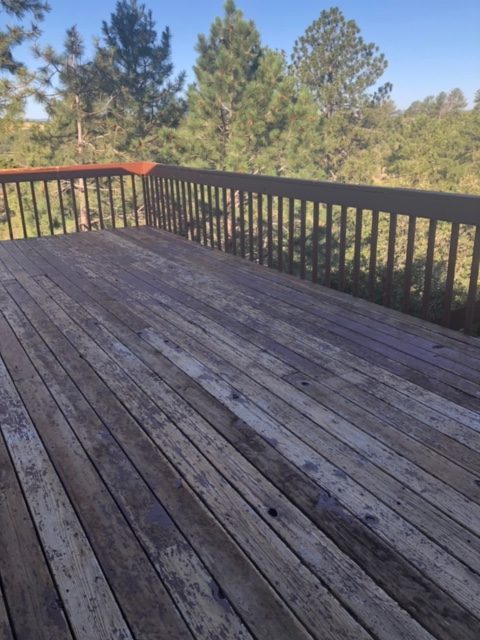
As you are power washing you will notice that if you have loose paint it is usually easily removed by just spraying it with the power washer. If you have loose or peeling paint that doesn’t come up while power washing you’ll want to scrap the excess off before painting. My deck was in such bad shape I didn’t have to do any scraping. All that old peeling redwood paint came right off. While you are power washing, be careful not to get too close to the wood. You can easily gouge your decking if you hold the spray too close.
Let the deck dry for at least 24 hours!
Some people use a deck cleaner after power washing to remove any leftover dirt etc. I actually skipped this step. I thought my deck was clean enough without adding another step to the project.
Taping
Once your deck is dry you’ll need to decide where you want to start.
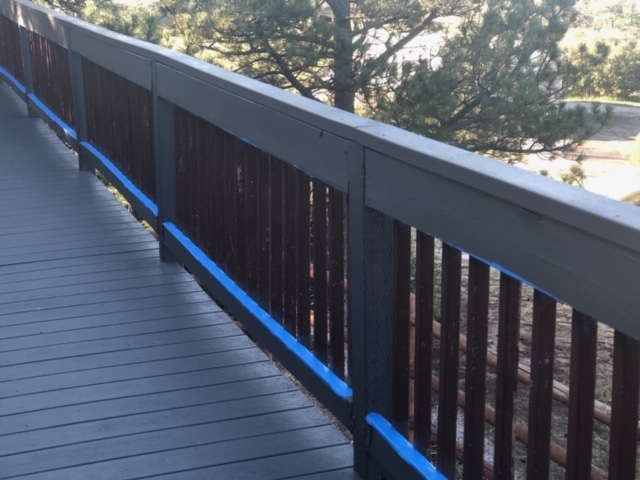
Now, if you’re going to paint your deck and spindles all the same color you will not need to tape anything off. I however wanted the two-tone look so I needed to decide whether I wanted to paint the deck and railing first or the spindles first.
I chose the railing and the deck.
Why? I’m pretty good with a paintbrush so I knew that I could easily paint the spindles after the rest of the deck was done without getting paint all over my freshly painted railing & deck.
You’ll need to decide how confident a painter you are and then decide from there.


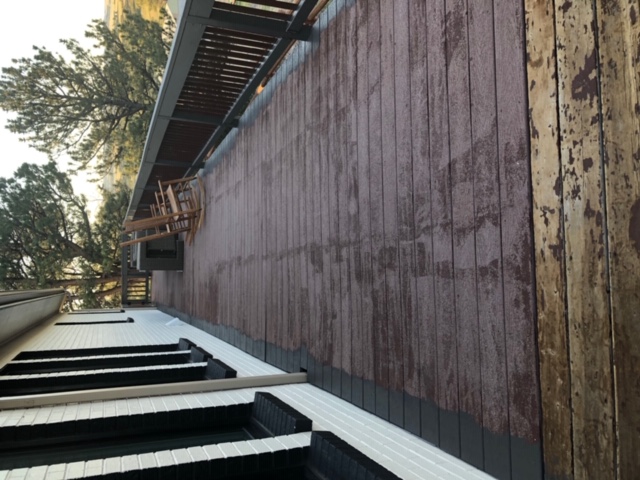
Paint Deck Floor & Railing
The deck & porch paint is quite thick and will dry very quickly if left sitting in the sun; so as you are painting your surfaces, try to keep your paint pan out of direct sunlight. Direct sunlight will create a film, and then you’ll have to scrape that off! Just one more step in the process that can be avoided.
We have just had our house painted, so I had to be very careful!
I took a paintbrush where the deck meets the house and painted approximately 16” of the deck away from the house so I didn’t need to get the roller so close to the house. If you want you can tape 6” or so up on your house to avoid getting paint on the house. Again this is all in how confident you are with a paintbrush.
Once I painted the area around the house I started rolling the deck. Be very strategic in where you start so you don’t “paint yourself into a corner.”
Once you have the deck painted you can move on to the railing. While painting the railing don’t worry about getting paint on the spindles as these will get covered up with the other paint color you have chosen.
2nd Coat
Allow your paint to dry at least 24 hours before applying the second coat!
You can see I bought a lot of paint. My deck is approximately 4000 square feet and is HUGE with two sets of stairs leading to the back yard.
You may not need as much paint as I did, but I knew the redwood paint would show through; plus my thought was that 2 coats will make last longer. …and, I’m not painting planning on painting the deck again in 5 years! I hope by the time it needs a refresh, it’ll be in the budget for a whole new deck!
Remember, I mentioned we had a LOT Of rain, so hopefully, it doesn’t take you 3 months to finish your deck as it did me! 
Paint the Spindles
Once the two coats of paint on your deck and railing have dried for at least 24 hours, you can now move onto your spindles.
As you can see I taped around my spindles so that I could actually be a little less careful when getting close to the railing and the deck itself. If you’re a neat painter and good at cutting in you won’t need to tape.
(Side Note: I know you’re saying to yourself, “Wouldn’t it have been faster if Terri used a paint sprayer?”?
Yes! However, we live up on a hill with a lot of wind. I would have been fighting the wind all the while trying not to get paint on my freshly painted house, (and myself, and the dogs.. lol!) so that’s why I chose to paint it by hand.
By all means, if you have the tools/resources, and a lot less wind, then, tape up of your house and use a paint sprayer!)
Don’t forget: Allow your paint to dry at least 24 hours before applying the second coat!
Finished!
Once the spindles are dry, remove all that blue painter’s tape- go out and buy some cute outdoor furnishings & plants to decorate your new space!
Creating a comfortable & useable outdoor living space is a great way to maximize your property’s potential, plus, especially here in Colorado, living outdoors is what we do year-round!
Now that my deck project is done, and I no longer have to look at the ugly, dated & peeling redwood paint, I will definitely be enjoying my new outdoor living space with our friends, family & of course, our pups!
For more DIY projects – news & community updates – please be sure to sign up for my monthly newsletter below!
Happy DIY!
~Terri


Related Articles
More…

March Quarterly Dump
Making it Through the First Quarter (Download the PDF of this newsletter here) Well, we’ve officially made it through the first quarter of the year, and it definitely has not been an easy one for...
DIY Brick Exterior
Are you trying to decide if you should paint your brick home? Have you been agonizing over it? Losing sleep? This month I’m going to go over how I decided whether or not I should paint my brick...

DIY Countertops
Welcome Back! This month’s DIY project is updating those ugly 80’s laminate countertops. You might be saying why not just replace them? Good Question. The answer is… Eventually all 4 bathrooms...

Follow Us
Join
Subscribe For More Projects, Updates & Offers